Wednesday, October 14, 2015

Creating Towers

One of the second grade Science goals is to


And boy, do I love teaching this one, especially at the beginning of the year!  We work in teams, so we're learning how to compromise, and be good teammates, in addition to making Science discoveries.  It's always incredibly rewarding for the children to see the results of their work!

Last year, I asked student teams to build bridges and brought materials that would lend themselves well to the task.  The bridges came out great, and the children made wonderful discoveries.  However, I realized that we didn't learn as much about material selection as I had hoped.  


This year, I invited the children to choose what they would like to build and brought materials that I thought were appropriate, as well as those that were not.  This way, the children could make appropriate discoveries about the quality of their materials.  I also included an interactive notebook component, so that I could see each individual's thinking about the materials.  These changes made such an improvement in our learning!

 We discovered that materials are stronger if they have something to hold them together, rather than just stacking them.


We were disappointed to learn that balloons do not make particularly sturdy towers, regardless of how you use them.  This also gave us the opportunity to review properties of matter. :)


 We all agreed that the balloons were the most fun to include and made great decorations.


Toothpicks were shockingly sturdier than expected, but not when they were the only support system for a tower.


We also learned about the importance of distributing weight.  I have a feeling this will come in handy when we try to build these towers again, and improve upon them!


Finally, we completed our interactive notebook page.  I'm all for conserving paper, so we simply did this in our notebooks.  This was the right side.  On the left side, we wrote what we learned from testing the towers and what we would do differently when building our new towers.  Then, we created an illustrated plan of the new towers, including justification for our new materials.
 
I can't wait to see the next set of towers.  They will definitely help me understand whether we've grasped the material selection as I hoped we would!


Monday, October 5, 2015

Two Great Questions

At a recent professional development session, our assistant principal asked two wonderful questions:

If your students didn't have to be there, would you be teaching to an empty classroom?

Do you have a lesson you could sell tickets for?

I always consider what would be fun for students and what would be the most memorable way to teach a topic, but the way these questions were phrased really made me stop and think.
How often do I consider student passions above student test scores?  Am I encouraging students to look for things they love and excel at in each lesson?  Are the students having a fun-filled, memorable second grade year?

As a Title 1 teacher, it can be easy to be swept away by goal setting, data, and test scores.  These are all important things, and honestly, students feel AMAZING when they reach their goals. It is important, though, that I consider who they are as people, too.  What are their goals outside the classroom? What are their hopes and dreams?

Here are a few ways I have helped myself refocus.

Responsive Classroom
Responsive Classroom is incredible, and their Morning Meeting structure is fantastic.  It helps develop more than effective classroom management; it helps develop a true community.  We start each day with a greeting, which gives us a positive way to start our day together.  Part of the meeting is a share time.  By sharing topics of their choice, students are able to give us a peek into who they are outside the school day.  (Bonus: It helps them develop writing ideas!)

Create
Any time we can do something creative with our learning, we do it!  There are so many ways to integrate student creativity into lessons.  Creative integration can be as simple as inviting students to choose the colors for the anchor charts or help develop the word problems.  I've noticed that truly inviting students to create as part of a lesson is a great way to ensure their engagement.  

We've crafted our favorite Truffula Tress to learn about graphing and extend literacy learning.
 

We've created wrist bands as part of a digital scavenger hunt for our aquarium field trip.

Recently, we borrowed the Flip Flop Facts Craftivity from Mrs. Lemmons and modified it to include some team building and creativity.  Students traced their feed and wrote their flip flop facts on each foot.  They were so excited to create their own flip flip feet, and now they really remember those facts!

Pinterest is filled with ideas for adding creativity into the classroom, and I've noticed that many of the printable or crafty items make great inspiration for my own lessons.  It's always important to consider the depth of learning and fit for my own students, so typically, I do not simply print or use "craftivities" directly from Pinterest, but I certainly let them inspire me!

Let them Lead
 I invite student leadership as often as possible.  Students run book talks, morning meeting, problem solving discussions, and more.  This way, they are in charge of our classroom activities, and they have so much fun running our daily routines.

 I always provide a framework for student-led discussions, so English Language Learners are supported as they lead and participate.

Move
Since I am also a music and movement teacher, this one comes very naturally to me.  We move as much as we possibly can.  We've done some Brain Gym, Total Physical Response, incorporated sensory input, and simply danced it out as often as possible. 


I also create songs, chants, and dances that relate to our content areas.  It makes me laugh when students come back to visit and ask if we have done a particular song or chant yet.  These seem to be memorable!

Find Balance
Above all, I've noticed that if my personal life and work life balance are out of whack, my teaching suffers.  I am the type of person who could easily spend every waking moment in my classroom or working on school-related tasks.  However, this results in a huge drain on my creativity!  So often, great lesson ideas come from real life experiences, and our personal experiences help us better relate to our students.  So, I work hard to keep my weekends for family, friends, and personal life.  This way, when I'm modeling writing, I really do have something to write about! :)


Thursday, October 1, 2015

Classroom DIY - Fence into Wall Display


When we moved into our house, the fence was falling down.  We knew it would have to be replaced and were excited to have so much wood to use for crafting!  As I sat looking at the finished product, I realized that this would also be a great classroom project.  

We are using it to hang pictures of our wonderful family and friends.  In the classroom, it would be awesome for pictures of class events to inspire student writing or as a wall of fame to celebrate student successes.

This would definitely not fit in my current classroom, as I have been blessed with walls full of cabinet space.  However, I am thinking of a few giant classrooms I've had the pleasure of working in.  There was always extra space available in my double-sized classrooms.  This would have been a great addition to our decor!

It was remarkably easy and almost free, since we happened to have almost everything on hand.  We started by picking the best fence pieces.


Then we tested all the sandpaper we could find.  We liked the look of the 100 grit (top) and were shocked at how different it looked.  About a million other ideas came to us when we saw that!


Then we sanded it, so it wouldn't hurt anyone or mess up the look of the paint.  This awesome guy is the brains behind hanging the fence on the wall.  I married a genius, I tell you!


I, of course, had a blast.  DIY project?  Home improvement project, and I can't mess it up?  YES!


I painted it with colors we had from painting various parts of the house or samples we looked at when we were trying to pick colors.  Then we hung it up.  Please forgive the horrible glare!


We used Gorilla glue to attach 3/4 inch clothespins to the center and outer edges of the fence posts.  We attached the twine to each one, then hung pictures with the rest of the clothespins.

We are really enjoying this in our living room.  If you have a giant classroom to decorate, this would be a great way to do it!

Happy DIYing!


Tuesday, September 22, 2015

Matter


I just love starting the year with matter.  It's a fun unit, and it helps me get to know each child in a fun way.  At the end of last year, I asked my students what they loved about second grade, and many of them mentioned the kick off to this unit!

We start by putting a Mento mint into a bottle of Coke/Diet Coke.  The resulting "explosion" is fun and memorable!  Then, we talk about the different states of matter we're observing.  This builds curiosity from the scholars and helps us start wondering what happens when we combine different things. I also love that it gives us an opportunity to talk about safety - You never know what will happen when you combine two objects, so ask first!

Next, we repeat the experiment with a student dropping the mint into the bottle.  I cover it with a balloon, so we can observe the gas being emitted from the reaction.  A word to the wise: We didn't sit far enough apart in our circle this year, and a couple students had a sweet surprise sprayed on them!  Thankfully, they though it was hilarious!


Then, we explore the various states of matter.  My young friends always seem to enjoy investigating the liquids the most.  


An interesting misconception came up this year.  Upon investigating, students decided that a distinguishing characteristic of liquids is that they are flexible.  When they arrived at the solids station, we had an awesome conversation about the flexibility of rubber bands.  Through questioning and conversation, they were able to distinguish between the two and create a more accurate definition of liquids before we used a class definition.  I think the experience was much more meaningful than it would have been if I had given the definitions first.


We'll continue this week with classifying matter in various ways.  I created classification bags (only some of the items are pictured below - more will be added in the classroom), and we'll use them to see how many different ways we can sort matter.  We'll also talk about why it's helpful to be able to classify in different ways.


We'll also practice classifying matter by relative mass using this interactive notebook page (click if you'd like a copy).  A vocabulary sort and activity are also included.  These are particularly helpful for English Language Learners.

https://drive.google.com/file/d/0B4q8MbAHZ4OLYXFGQmgxOGYzX0U/view

On the left side of our notebooks, we'll draw and describe what we observe when comparing the mass of a traditional golf ball and a plastic golf ball.  We'll also classify rocks, sort solids, liquids & gasses, and classify matter using flexibility.  It's going to be a blast!

Thursday, September 17, 2015

A Fun-Filled Start


The first day of school can be filled with big feelings for such young people (and older ones, too)!  To start in a positive way, I give the children Ready Confetti at Meet the Teacher night.  I print it on brightly colored card stock and stick balloon confetti in baggies on the inside.  

This is a great way to build excitement for the first day of school, and it helps get the bedtime reading routine started before the first day!  When children arrive at school, it gives us something to talk about right away, and we already have a common bond from having done the same bedtime activity the night before.  It's such fun!

When the children arrive at their desks, they find Magic Balls, which I discovered at Heather's Heart.

Use the magic ball for the first day of school. I do this and the kids love it. Love the name and labels though!:

We never know what experiences and backgrounds our children are coming from, so this is a nonthreatening way to assess their skills and allow them to enjoy a sensory experience (and get some of those jitters out).  Here are some of the basic skills I assess in those first few minutes with the Magic Ball:

Motor Skills
Sensory Experiences
Reading Skills (What are we hoping will happen? What does it mean that it changed color?)
Self Expression
Following Directions

After we are all settled in for the day, and I've completed my morning responsibilities (taking attendance, breakfast/lunch count, greeting families, and helping children unpack), we use the Magic Balls for a conversation starter.  We think about the way we are feeling and use our Magic Balls to express those feelings.


It's a fun way to start the day, and it helps us get to know each other in so many ways!

Sunday, September 13, 2015

Back to School


It has been a wonderful return to school this year!  My sweet scholars and I have been having a blast getting to know each other.

Our school hosts a Meet the Teacher night the Thursday before school begins, which is a fun way to meet the children and families before the first day of school.  I had the desks set up with notes from former students and a note from me.  (Click here if you want the editable version.)


I also used these adorable labels on bubbles from the dollar store.  I'm not sure who to credit, because all I can find is the Google Drive file.  However, they are a hit every time!  I'm sorry I keep forgetting to take a picture!

Finally, I gave bookmarks to each family to help them remember that parents are key to our success, especially when it comes to building a love of reading.

I hope you're enjoying a wonderful start to the school year!

Tuesday, April 21, 2015

Morning Meeting Greetings


As you know, we have a morning meeting (or afternoon meeting, depending on our schedule) each day in my classroom.  We love saying hello in many different ways!  Here are a few ways we've been greeting each other lately.  If you want to use them in your classroom, just click on the image for a freebie.

Dice Roll

Roll the dice and  find the sum (or difference, depending on the skill you're practicing).  
Count that many people around the circle.
Shake hands with the person you end on.

I use giant dice for this.  I got these as a gift from an AMAZING PE teacher who used them in his class:


And I bought these at Mardel for when we are just starting out.  They also work well in the lower grades.  You can also use them to build number sense.  So, instead of finding the sum, you could roll 1 die and count that many people to greet.


 Giant Soft Cubes with Numbers


Who Rocks the House?

Say this chant, with each child taking a turn dancing in the center of the circle.
Who rocks the house?
(Child's name) rocks the house!
And when (child's name) rocks the house,
She rocks it
all the way down!

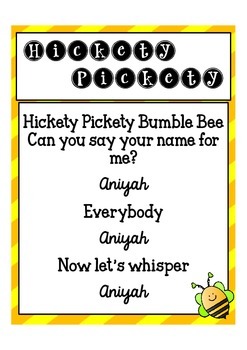
 Hickety Pickety Bumble Bee

Hickety Pickety

Hello in Many Languages

Choose a language.  Choose a person to start.
The person who is starting turns to the person next to him/her and says, "Hello (child's name)" in the selected language.
The greeting is then passed around the circle.
A few ways to say hello: jambo, hola, bonjour, hodi, kon'nichiwa

Multidigit Addition Match Up

Each person takes 1 card and solves the addition problem on it.
Students sit in a circle and take turns greeting the person with the matching sum.
Note: Some of the cards intentional have similar sums to help scholars work on accuracy.  We do this as a whole group the first few times, so we can double check our work.  After that, we might solve and find the person matching sum without sitting in a circle.

Multi-digit Addition Match Up

Saturday, April 11, 2015

Easy Classroom DIY - Guided Reading Phones


Confessions: I love DIY, and I am a Pinterest junkie.  Evidence: My husband and I made this out of our broken fence, and we had a BLAST!  (Details to come, in case you want to try something similar in your classroom.)


My first classroom DIY project was to create guided reading phones when I started teaching ages ago.  They are insanely easy and very inexpensive.  More importantly, they have been incredibly helpful for my young scholars.  The tutorial is below, but first, here's how they help: 

Fluency: Students can hear themselves read, so they are more inclined to notice when they are "Robot Reading".  (Audacity is another great tool to help with this.  They can record themselves, listen to their finished work, and evaluate it with a rubric.)

Self Monitoring: In the younger grades, the children often do not listen to what they're saying as they read.  The Guided Reading Phone is a great reminder to pay attention to what you're saying and make corrections when it doesn't make sense.

Focus and Independent Work: It can be difficult for young scholars to focus on their own thinking when people around them are reading out loud.  If they are reading the same book, children may find themselves reading chorally with the person who is the best at decoding, rather than doing the work of decoding on their own.  The phones are a great way to help children focus on what they are doing and prevent distraction.

Fun! Above all, reading should be fun!  My biggest goal is to inspire students to catch the love of reading.  I do everything I can to help them experience the pure joy of reading a good book.  If a Guided Reading Phone makes them willing to try it, I'm all in!

The phones are totally worth it and have been really helpful for my little ones.  You can buy them for about $5.00 each at almost any education store.  You can also make them with a couple items from the hardware store.  I've included pictures of the packaging at Home Depot (where I got my supplies), so you could see the skew number.  They were much harder to find when I made a few new ones last week, so I thought more details might be helpful for you!

Here's what you need:


All you do is fit them together in the shape of a phone.  Couldn't be simpler!  I usually wipe them off with an antibacterial cloth after making them, just to be safe.


Happy Reading!


Wednesday, April 8, 2015

Earthdance, Roller Coaster and a Writing Lesson


I just adore books that teach a million things at once and leave you with that satisfied, peaceful feeling when you close them.  Earthdance is one of those books.  It is one big celebration of Earth and all those who dwell here.

Displaying IMG_1903.JPG

 The book is fantastic as a read aloud, just for pure enjoyment.  It's also a great addition to an Earth Day celebration.  You could use it at the beginning of the school year to remember that we are part of something bigger and everyone around us is valuable.  I love to celebrate diversity at the beginning of school; it sets the tone for the whole year.

Another great way to use Earthdance is as a mentor text for writing.  The illustrations perfectly capture the structure of a story and lend themselves well to teaching a story map.  It would be great to pair it with Roller Coaster, which I use as a mentor text when I'm teaching small moment stories.  

Image result for roller coaster book

I've often used it to remind students that our stories really work like a roller coaster.  Earthdance is another great mentor text for the same topic.  This year, I was inspired by Cole Elementary to use this anchor chart, instead of the simpler version I usually create.  (Click on the image to check out their blog.  There are some other great anchor chart ideas there.)

http://thecoletrain5060.blogspot.com/2011/10/hooked-on-anchor-charts.html

 This really helped my young writers remember the structure of the story.  I especially loved the idea of using the sticky notes to plan and evaluate our stories.  We used them to check a draft I had written and discovered that my story needed some revision - it was missing the action!

The students created roller coasters in their notebooks and used sticky notes to plan and evaluate their own stories.  It was so sweet to see them using their hands to create the roller coaster as they re-told their stories.

I wish I thought to take pictures of their work, but I was way to involved and excited by conferencing with them to think about that!

Anyway, Earthdance is a fantastic follow up lesson, because it shows that the action and excitement of a story can go beyond just the problem and solution.  A book can have a fabulous purpose and carry great meaning by making a simple variation to the story structure.

I can't wait to try it out!

Monday, April 6, 2015

Peek at My Week - Field Trip


It is a field trip week for us!  My young scholars and I are SO excited to visit the aquarium!

Here's a quick peek at everything else we're up to this week:


We have lots of fun planned for our aquarium trip, too.  First, we will do some research on different types of animals and their habitats as part of our digital learning classroom challenges.  (Our ITS is seriously a genius.)  Check out everything we're doing on Twitter.  You can follow me (mrszenyuch) or just check out #bigDEALjmt

  Anyway... we'll use our research to write predictions about which animals we'll see at the aquarium.  We'll write them on these colored bands (conveniently also the colors of our groups) and wear them as bracelets.  They'll become a scavenger hunt as we travel through the aquarium.  We'll earn bonus bucks for every animal we find.


They are very simple, but they are our field trip version of the HOWL bracelets we've been using at school.  Our PBIS team came up with these awesome bracelets, and the kids are LOVING earning them.  Anytime an adult sees them doing something correctly in a common area of the school, we get to celebrate their success with a bracelet.  We can't give them to our own students, so it's been equally exciting to cheer for my students when they earn them! 


While we're at the aquarium, we will also work on discovering how animals interact with their environments using this interactive notebook page. We'll glue it into our notebooks before we leave for the trip, and work on it while we're there.  When we get back, each child will create an animal that would fit into the environment he/she picked.


Finally, anyone who wants to earn Bonus Bucks can work on one of our #bigDEALjmt classroom challenges.  I selected the ones that would be most successful during the trip, and we'll take the iPads with us (Yup!  I am just that lucky!), so the kids can use technology to show what they know.


I hope you have an awesome week!


As always I'm linking up with the wonderful Mrs. Wills.  Click on her button to find out out what everyone else is up to this week.